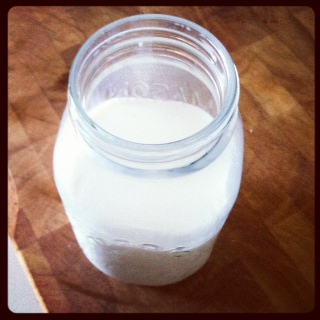
You may remember that we've talked about yogurt here before. Funny, it was about the same time last year.
I thought I'd like to try it again but give the greek yogurt version a try. We've been using a ton of greek yogurt around here. In place of sour cream in my ranch dressing, and well in about everything else too. I followed this recipe. I love her book and use it often for homemade versions of processed foods. She's updated her yogurt making method and is using a crock pot, which makes the whole thing way less intimidating and super easy. The only thing I would add is that I had to turn my crock pot back on after a few hours because it wasn't setting up. I put it on the warm setting for about an hour to bring the temperature back up, then wrapped it back up with a towel and left it until morning. Total time I left mine wrapped up was about 16 hours.
I think I'd like to try to freeze some. Brielle has already decreed that it's better than Sweet Frog! Total ingredients used - 2. I used 1/2 a gallon of whole milk from the local (well closest thing we have to local) creamery and 1/2 cup of Fage 2% greek yogurt. Total cost about $4.25. I got 1 1/2 quarts of yogurt and almost a quart of whey. You could use any milk that's not ultrapasteurized. Mine is a bit pricey compared to store milk.
I highly recommend you give it a try. Happy Friday!
Showing posts with label in my kitchen. Show all posts
Friday, June 28, 2013
Tuesday, June 11, 2013
chocolate chip cookies... from a magnet
I, like most adults (and for that matter most kids), have had a pretty vast variety of chocolate chip cookies in my 30+ years. Some have been moist and yummy, some dry and crumbly. I think everyone has a recipe that is their favorite. Their version of perfect. I found mine on a magnet. I don't really even know where the magnet came from, I just noticed it on the fridge one day. I'm not sure what prompted me to try it, but I did and I have made. no. other. recipe. since. It's amazing! Super simple and always, always delicious.
I'm going to share the recipe with you (it's probably on the back of every pack of Hershey's chocolate chips... shhh, please don't tell me)
Hershey's Chocolate chip cookies (with some additions I make)
Heat oven to 375. Beat 1 C. butter, 3/4 C brown sugar, 3/4 C Sugar and 1t vanilla until creamy.
Beat in 2 eggs. Stir together 2 1/4 C flour, 1t. baking soda & 1/2 t. salt (I use coarse salt and up it to 1 teaspoon)
Gradually beat into butter mixture. Stir in 2 C Hershey's semi-sweet choc. chips and 1 C. chopped nuts. (I also add one cup of rolled oats)
Drop rounded teaspoons onto un-greased cookie sheet. Bake 8-10 minutes until lightly browned. Cool and ENJOY!
That's it, just as it's written on my magnet. Chocolate chip cookies are the emblem of home and family and these cookies are the perfect version for our family and family friends! A dear friend's little boy comes to mind each time I make these because he loves them so much. That's the point of it all really, why we bake, to make the people we love smile.
I hope today finds you smiling. Happy Tuesday!
The day my babes broke the magnet was not my finest parenting moment. It's broken, I'm not pleased, but now it lives on the tippy toppest regions of the fridge where it can be safe from little destructive hands.
I'm going to share the recipe with you (it's probably on the back of every pack of Hershey's chocolate chips... shhh, please don't tell me)
Hershey's Chocolate chip cookies (with some additions I make)
Heat oven to 375. Beat 1 C. butter, 3/4 C brown sugar, 3/4 C Sugar and 1t vanilla until creamy.
Beat in 2 eggs. Stir together 2 1/4 C flour, 1t. baking soda & 1/2 t. salt (I use coarse salt and up it to 1 teaspoon)
Gradually beat into butter mixture. Stir in 2 C Hershey's semi-sweet choc. chips and 1 C. chopped nuts. (I also add one cup of rolled oats)
Drop rounded teaspoons onto un-greased cookie sheet. Bake 8-10 minutes until lightly browned. Cool and ENJOY!
That's it, just as it's written on my magnet. Chocolate chip cookies are the emblem of home and family and these cookies are the perfect version for our family and family friends! A dear friend's little boy comes to mind each time I make these because he loves them so much. That's the point of it all really, why we bake, to make the people we love smile.
I hope today finds you smiling. Happy Tuesday!
Monday, January 28, 2013
Sweet and Spicy Roasted Almonds
One of my biggest cravings during the Daniel fast is sweets. I miss them. I need them. I have dreams about them. Well I found a crave satisfying treat. Who doesn't love a bit of salty, sweet and spicy? No one I know!! These have a nice blend of all three. If you find you'd like a bit more spicy or salty just adjust the recipe to suit your tastes.
Honey Cayenne Sweet and Spicy (Daniel fast approved) Roasted Almonds:
adapted from Lemons and Anchovies
2 1/2 cups of raw almonds
1/3 cup honey
3/4 teaspoon cayenne pepper
1 teaspoon kosher or coarse sea salt (really any salt will do)
Preheat oven to 325. Line a rimmed baking sheet with wax paper.
Melt the honey in a skillet over medium heat. Add cayenne and the almonds and stir until nuts are well coated.
Spread the almonds on baking sheet in single layer and bake for about 10 minutes.
** this next step is super important. I waited too long to remove the almonds from the wax paper and ended up picking very small pieces of paper off some of the almonds**
Remove the wax paper and toss the almonds with the salt. Spread almonds back out on bare sheet pan and allow to cool completely.
Transfer to a serving bowl and enjoy! Store in air tight container.
Here's wishing you a Happy Monday! I hope today finds your home filled with warmth, love, laughter and a bit of sweet!
Honey Cayenne Sweet and Spicy (Daniel fast approved) Roasted Almonds:
adapted from Lemons and Anchovies
2 1/2 cups of raw almonds
1/3 cup honey
3/4 teaspoon cayenne pepper
1 teaspoon kosher or coarse sea salt (really any salt will do)
Preheat oven to 325. Line a rimmed baking sheet with wax paper.
Melt the honey in a skillet over medium heat. Add cayenne and the almonds and stir until nuts are well coated.
Spread the almonds on baking sheet in single layer and bake for about 10 minutes.
** this next step is super important. I waited too long to remove the almonds from the wax paper and ended up picking very small pieces of paper off some of the almonds**
Remove the wax paper and toss the almonds with the salt. Spread almonds back out on bare sheet pan and allow to cool completely.
Transfer to a serving bowl and enjoy! Store in air tight container.
Here's wishing you a Happy Monday! I hope today finds your home filled with warmth, love, laughter and a bit of sweet!
Friday, January 25, 2013
Let's translate your egg carton, shall we?
I've been given the green light by hubs to expand my laying hen flock this year. It's a very exciting time! Just yesterday I ordered 30 chicks that will arrive next week.
If you aren't sure about whether or not it's "humane" to ship hatched chicks in the mail, read Joel Salatins book "Folks this ain't normal". He breaks it down very simply (and it's a great book that I think every food eater should read). The jist is this, God made them that way. Mama hens have eggs hatch for a few days, since they are laid over the course of days they don't all hatch at once. Because of this, they have to sustain life under her until she takes all the chicks out to find food and water. So hatcheries can ship chicks the day they hatch and you get them by day two or three.
As much as I'm looking forward to having extra eggs to pass along to friends and family. I feel a little apprehension. Very often I find myself explaining why my eggs (and all local and pastured eggs) are better (and sometimes, more expensive). I thought I'd use this space to put some of that info together.
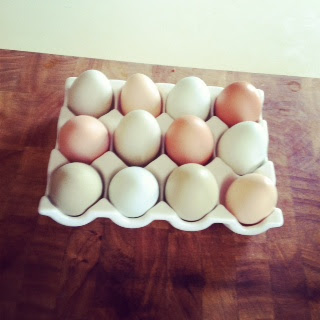
After I posted about my eggs on facebook last night I started to wonder how much "store eggs" cost? And what the differences are. So as I was walking thru the grocery store last night I stopped in to see. I was baffled. There were a few that were less expensive and a few that were more expensive, but none, not one, that was comparable in quality. So how can folks question the cost? Then it hit me! Bam! They don't know what they are getting at the store. The cartons all sport words like farm fresh, all natural, cage free, vegetarian fed. Do consumers know what those words actually mean? Do they think farm fresh means that they came from a farm with a red barn and a white picket fence? Do they think cage free means chickens pecking around rolling fields of green? Do they think chickens are supposed to only eat vegetarian?
I found a good article in Mother Earth News about this topic and am going to use some of those points. Everything take from that article will be in italics.
Ok, let's get started. First off, none of the verbiage on these labels is really regulated, "although there are some third-party verification programs".
Cage Free- that means, simply that. They are not in cages. They live in big warehouses but are not required to have roosts or nesting boxes to behave as normal chickens do. “Cage-free” does not mean outdoor access."
Free Range- often times that means that they have access to the outdoors, but doesn't mean they forage or even that there is grass. “free range” usually means the laying hens are raised in large flocks in big open warehouses rather than in stacked cages. They can walk around, flap their wings and preen their feathers a little. Usually means? huh.
If you aren't sure about whether or not it's "humane" to ship hatched chicks in the mail, read Joel Salatins book "Folks this ain't normal". He breaks it down very simply (and it's a great book that I think every food eater should read). The jist is this, God made them that way. Mama hens have eggs hatch for a few days, since they are laid over the course of days they don't all hatch at once. Because of this, they have to sustain life under her until she takes all the chicks out to find food and water. So hatcheries can ship chicks the day they hatch and you get them by day two or three.
As much as I'm looking forward to having extra eggs to pass along to friends and family. I feel a little apprehension. Very often I find myself explaining why my eggs (and all local and pastured eggs) are better (and sometimes, more expensive). I thought I'd use this space to put some of that info together.
"Conventional egg production — that is to say, the vast majority of egg production in the United States — is not a pretty business. Laying hens are crammed five or six to a cage in stacked rows of cages designed for automated feeding, watering and egg-collecting. As many as 100,000 birds can be confined in a single warehouse, each bird with less than 67 square inches, about two-thirds the size of a sheet of paper, to call its own. The crowded conditions lead to cannibalism and other destructive behavior, so the birds’ beaks are cut off at an early age, a procedure that could be likened to cutting off a child’s finger tips, in terms of its impact on the animals’ dexterity and sensory experience. The industry favors windowless warehouses with prolonged artificial light to stimulate maximum egg-laying. When egg production drops off, food is withheld as a way of sending the birds into a forced molt followed by another round of egg laying before being disposed of.
The adoption of practices like these has paralleled the spread of salmonella as a bacterial contaminant in eggs — the reason you’re cautioned not to eat raw cookie dough or Caesar dressing anymore. Crowded conditions, genetic uniformity and the widespread use of antibiotics in industrial agriculture favor the development of new and potentially more devastating pathogens" from MEN article (see link below)
After I posted about my eggs on facebook last night I started to wonder how much "store eggs" cost? And what the differences are. So as I was walking thru the grocery store last night I stopped in to see. I was baffled. There were a few that were less expensive and a few that were more expensive, but none, not one, that was comparable in quality. So how can folks question the cost? Then it hit me! Bam! They don't know what they are getting at the store. The cartons all sport words like farm fresh, all natural, cage free, vegetarian fed. Do consumers know what those words actually mean? Do they think farm fresh means that they came from a farm with a red barn and a white picket fence? Do they think cage free means chickens pecking around rolling fields of green? Do they think chickens are supposed to only eat vegetarian?
I found a good article in Mother Earth News about this topic and am going to use some of those points. Everything take from that article will be in italics.
Ok, let's get started. First off, none of the verbiage on these labels is really regulated, "although there are some third-party verification programs".
Cage Free- that means, simply that. They are not in cages. They live in big warehouses but are not required to have roosts or nesting boxes to behave as normal chickens do. “Cage-free” does not mean outdoor access."
Free Range- often times that means that they have access to the outdoors, but doesn't mean they forage or even that there is grass. “free range” usually means the laying hens are raised in large flocks in big open warehouses rather than in stacked cages. They can walk around, flap their wings and preen their feathers a little. Usually means? huh.
“Certified Organic.” Production methods must comply with the USDA National Organic Program, including organic, vegetarian feed, no use of antibiotics and no cages. Debeaking and forced molting by starvation are allowed. Organic standards require producers to “maintain livestock living conditions which accommodate the health and natural behavior of the animals.” How much access to the outdoors this requires for chickens is still being hotly debated. At this time, on large organic chicken farms, it may mean nothing more than a small door opening onto a concrete yard.
“Omega 3.” All eggs contain small amounts of omega-3 fatty acids, thought to be beneficial to human health. Omega-3 levels in eggs can be raised by supplementing the birds’ diet with things such as fish oil, flax seed or alfalfa meal (or by simply allowing the birds to forage on lawn or pasture).
As I was finishing up this post I found this! Please check it out. It shows loads of labels along with what they mean. Super helpful.
Now, I'm going to get up on a soap box for a minute. If you'd rather not experience that please feel free to leave this page now. Good, you stayed. Folks, just buy local! Even if you buy your eggs from a family with 4 hens that only eat in their small back yard, you are getting a better, healthier product. Do a test, take a store egg and a pastured egg and crack them side by side in a pan. Eggs should have a bright yellow (even orange sometimes) yolk that stands up nicely, with a firm (not runny) white. Do you know what pastured means? You won't find it in the store, at least not yet. Farmers who raise pastured laying hens usually have those hens in movable coops that they move from place to place daily or every few days. The chickens only spend the dark hours in the coop the rest of the time they are foraging in pasture. Pastures full of bugs, seeds and grasses. Because they are moved on a regular basis the chance of disease is lower and they get an abundance of naturally occurring food. You see chickens aren't vegetarian. They eat bugs, big bugs, little bugs, even mice sometimes.
| Egg mobiles at Joel Salatin's Polyface Farm. |
So if you drive past a farm and see a big funny shaped trailer surrounded by chickens stop in and buy some eggs, they will blow your mind!! I'm sure like me, you want to feed your family the best that you can. When it comes to eggs, you won't find that in a store. You'll get that from your local farmer, your neighbor or the folks down the street.
Monday, January 21, 2013
Grr... GMO's in the flour too?
About 6 months ago I called King Arthur flour company and was thrilled that a real live person answered the phone. I asked about GMO flour and was told that there is currently no GMO wheat being sold in the US. Shew! One less thing to worry about. Or is it?
I consider myself fairly educated on the world of GMO "foods" and the products that are made from them. I know that almost all the corn and soy grown in the US are GMO. I look out for it on all labels, I buy organic popping corn, I don't use vegetable, corn or canola oil. So I am a incredibly saddened to learn that while the wheat that makes our flour is not GMO the way that it is often grown is not what I would have thought.
An amazing friend of mine spent many years traveling the country and met loads of folks along the way. One such folk is a farmer in Kansas. While visiting said farm my friend learned that after the wheat is harvested, soy is planted in the same field. Ok, that doesn't seem so bad at first, but this soy is Round Up Ready soy beans and they are sprayed with the poison during the growing season to prevent weed growth. Here's the problem... the wheat is then planted in the same place after the soy is harvested. Yep, that yucky Round up has soaked into the soil, the gmo soy seed has left behind who knows what as it grew the franken-soy plant.
Ugh!! So now I must add flour to my list of organic only. Why, oh, why must we put poison in and/or on so much of our food?!
Don't our babes deserve to eat food that is made from real plants? Not a version of a plant that a scientist created in a lab somewhere. A plant that more science than not, says is terrible for them and can lead to all sorts of health problems? I can grow my own corn, I can grow my own veggies and raise my own chickens for eggs and meat, but I can't find a local mill that's making non-GMO flour. So, I must settle for organic. This really does just make my heart sad. If you haven't educated yourself on GMO's please do. If we as consumers continue to assume that the food system is looking out for our well-being than we are to blame for the consequenses.
I consider myself fairly educated on the world of GMO "foods" and the products that are made from them. I know that almost all the corn and soy grown in the US are GMO. I look out for it on all labels, I buy organic popping corn, I don't use vegetable, corn or canola oil. So I am a incredibly saddened to learn that while the wheat that makes our flour is not GMO the way that it is often grown is not what I would have thought.
An amazing friend of mine spent many years traveling the country and met loads of folks along the way. One such folk is a farmer in Kansas. While visiting said farm my friend learned that after the wheat is harvested, soy is planted in the same field. Ok, that doesn't seem so bad at first, but this soy is Round Up Ready soy beans and they are sprayed with the poison during the growing season to prevent weed growth. Here's the problem... the wheat is then planted in the same place after the soy is harvested. Yep, that yucky Round up has soaked into the soil, the gmo soy seed has left behind who knows what as it grew the franken-soy plant.
Ugh!! So now I must add flour to my list of organic only. Why, oh, why must we put poison in and/or on so much of our food?!
Don't our babes deserve to eat food that is made from real plants? Not a version of a plant that a scientist created in a lab somewhere. A plant that more science than not, says is terrible for them and can lead to all sorts of health problems? I can grow my own corn, I can grow my own veggies and raise my own chickens for eggs and meat, but I can't find a local mill that's making non-GMO flour. So, I must settle for organic. This really does just make my heart sad. If you haven't educated yourself on GMO's please do. If we as consumers continue to assume that the food system is looking out for our well-being than we are to blame for the consequenses.
Thursday, December 6, 2012
A Princess Party
This weekend my oldest babe turned 5. She was very clear as to what her birthday party theme was to be... princess, princess and PRINCESS. Oh, and Pink.
We used a huge 16ft door and some cinder blocks to create a short table in the living room floor that would allow all the kiddos to sit on the floor instead of having to use chairs. (put that in the great idea column)
The fabric store had a great sale black friday weekend. All of their tulle was $.50/yard. I think I ended up with 25 yards! This may seem like a silly expense, but it isn't. You see, in the spring I will once again, plant a garden. And surely, I will have bugs and surely, I will need bug netting. Voila!! 25 yards of pink bug netting bought at $.50/yard.
The table was so pretty with the tent of pink tulle and balloons. Each little picked their own felt crown when they arrived and got to making it their own. I had glitter glue, pom poms, "jewels" and glue. All the essentials for making one super cool crown. (I will be posting later in the week with a pattern and more info on how to make these.)
Oh and the food.... So good! We had crown shaped peanut butter and jelly sandwiches, fruit, veggies and homemade ranch, ham pinwheels and pink popcorn. Instead of cake we had icecream cupcakes.
I am so happy with how the party went, but at the end of it all, I have a beautiful, independent, strong willed (I don't know where that comes from *winkwink*), kind, caring and wonderful babe who had a wonderful time enjoying her special day.
(We are just going to completley ingnore the fact that I took 2 whole months off from this space, welcome back.)
Tuesday, October 2, 2012
Just checking in
I just wanted to check in and give you a glimpse into what's going on here today..... Oh yeah, it's applesauce cooking day! It's cool and rainy outside and perfectly warm and wonderful inside. This my friends is fall. Plain and beautifully simple.
Monday, August 13, 2012
mmm... summer saved for later
I know I've been gone from here for a while. I haven't forgotten about you, it's been busy. Summer is a busy time of bursting gardens, sprinklers, grassy feet, hanging laundry and late dinner. It's also a time of preserving. If only I could preserve the sweet smell of summer mornings or the sound of laughing littles as they squeal with delight at the simplest of garden sprinkler. This is a sweet season we are in.
Late last week I bought a daunting 2 1/2 bushels of peaches as seconds from the local farmers markets. My sister and I had been planning on canning peaches as our first big preservation undertaking. I don't think either of us realized just how many peaches are in those boxes.
Friday afternoon we put up 13 quarts. Lesson learned that day, canning with babes underfoot is no fun. (and not super safe).
Last night we reconvened after the youngest of littles were all tucked into bed. We cracked open a bottle of wine, donned our sturdy aprons and got to work. My mom even stopped down for a few hours to help out and share the bits of canning wisdom that she remembers. It was very cool to be in my kitchen with 3 generations of ladies getting our canning on.
4 hours and 28 quarts later we, literally, threw in the towel at midnight. (I still have about 1/2 a box left that I will just peel and freeze.)
My kitchen has a thin layer of sticky on just about every surface. I've been cleaning and wiping all day but I keep finding little patches here and there. This is a sweet season we are in friends.
4 hours, 2 sisters, one bottle of wine, loads of laughs (some from exhausted delirium), boxes of peaches, classic rock on the radio..... sweet indeed. I hope that my babes will not remember when they learned to can or even why they love it so much but that it is simply a part of them that brings joy to their souls. I can be sure that the sore back and feet will be worth every bite of summer goodness in the midst of winter cold. More importantly though is the time spent with family and friends soaking up the blessings of one another and this season of sweetness we are in.
Late last week I bought a daunting 2 1/2 bushels of peaches as seconds from the local farmers markets. My sister and I had been planning on canning peaches as our first big preservation undertaking. I don't think either of us realized just how many peaches are in those boxes.
Friday afternoon we put up 13 quarts. Lesson learned that day, canning with babes underfoot is no fun. (and not super safe).
Last night we reconvened after the youngest of littles were all tucked into bed. We cracked open a bottle of wine, donned our sturdy aprons and got to work. My mom even stopped down for a few hours to help out and share the bits of canning wisdom that she remembers. It was very cool to be in my kitchen with 3 generations of ladies getting our canning on.
4 hours and 28 quarts later we, literally, threw in the towel at midnight. (I still have about 1/2 a box left that I will just peel and freeze.)
4 hours, 2 sisters, one bottle of wine, loads of laughs (some from exhausted delirium), boxes of peaches, classic rock on the radio..... sweet indeed. I hope that my babes will not remember when they learned to can or even why they love it so much but that it is simply a part of them that brings joy to their souls. I can be sure that the sore back and feet will be worth every bite of summer goodness in the midst of winter cold. More importantly though is the time spent with family and friends soaking up the blessings of one another and this season of sweetness we are in.
Saturday, July 21, 2012
pasta and pesto.
I came home from town this morning to find my husband proudly holding a plate of homemade bowtie pasta. After telling him how great it looked, I asked "So you found the pasta maker?"
Looking quite confused, "What pasta maker?"
I pulled a box out of the cabinet and revealed an old school pasta maker that I picked up at a yard sale last summer.
"ugh. That would have made this MUCH easier".
We cooked the bowtie pasta and papa was heavily praised for his mad pasta making skills. However, he couldn't seem to walk away from the pasta maker for long.
The two youngest littles laid down and napped at the same time today. That time miraculously coincided with a break in the rain we've been having for a few days. This afforded me a few minutes to run to the garden and harvest some beans, beets, corn, one single solitary squash, the first 2 yellow cherry tomatoes (which were quickly devoured by hubs and Brielle) and the huge lemon basil bush. I've beens admiring that darn lemon basil and wondering why it was sooo big and what in the world I was going to do with it. Today was the day I needed to just leap. I chopped most of it down and spent 30 minutes pulling off all the leaves. It turned out to be over 10 packed cups of fresh basil leaves!
| Brielle wants you to know that she picked the brussel sprouts! |
I'll let you guess what happened when papa saw the vat of pesto on the counter..... yep! You guessed it, he made pasta!! It was really neat to watch Brielle and papa work together to turn 4 eggs and 2 cups of flour into a huge pot of pasta that fed our entire family with some left over for later.
![]() |
| My handsome hubs getting in touch with his Italian side!! I'm not sure why, but his NY accent was much heavier during this. |
The pesto was a perfect match!
Here's a jumping off point for the recipe. It's a huge batch so break it down to the size you need. Plan to taste as you go and make adjustments.
Lemon Basil Pesto
8 cups of lemon basil, packed
2 cups toasted walnuts (I laid them on a cookie sheet at 350 for about 15 minutes)
10 cloves of garlic
3 (ish) cups of extra virgin olive oil
3-4 cups freshly grated parmesean cheese
Add the basil, walnuts and cheese to your food processor (we used our blendtec blender which worked fine). Blend all ingredients together. Add about 1/2 the olive oil and blend. Slowly add more oil until you reach the consistency you desire. Add salt and pepper to taste.
I put three small containers in the freezer and one pint in the fridge for immediate consumption. I did add a layer of oil to the top of all containers to aid in freshness. Several of the recipes I read said not to add the cheese if you were going to freeze, but I did it anyway. We'll see I guess.
Hubs and I sat around the table with our littles and felt quite proud of the dinner we had made. Much more than if we had simply dumped a box of dry pasta into water and spooned on pesto from a jar. There was love in that pasta and pesto.
I hope today finds you with love, and maybe a little garden harvest, around your table.
Tuesday, July 17, 2012
Yogurt
Late last week we began really working toward buying even less processed food and things packaged in single use plastics. I cut my grocery budget in half shopping this way! It was crazy. We are very lucky to have a Mennonite market in our area that sells food in bulk and minimally packaged so I loaded up on flours, oats, sugars, molasses and other ingredients. Oh and peanut butter, super fresh peanut butter. Like, stand there and watch as she poured in the peanuts and filled my container with still warm peanut buttery goodness. OH yeah!
Sorry, I got distracted. I also added whole milk and heavy cream to my purchase from the farmers market. The plan is to make butter from the cream and use the buttermilk to make creme fraiche. I didn't want to wait to order yogurt starter powder so I picked up plain Greek yogurt to use as my starter. I followed the directions in Homemade Pantry with serious focus and had great success. Oh and did I forget to mention that I thought I ruined the whole batch?! Yeah, I was supposed to let it sit in a warm place for 5 hours, that would have been until 2:30. At 6 I realized I had forgotten it. I was incredibly relieved that all my hard work (and half a gallon of whole milk) had not been wasted, it was fine.
There are loads of recipes out on the web but I'll give you the basic order of things so you can see just how easy it is.
You cook the milk to a certain temp and then cool it, add the starter, pour it all into jars, wrap them in towels and put in an insulated cooler in a warm place. Wait 5 hours and then refrigerate. That's it. So easy. This is totally doable, if you were on the fence, jump. You can make your own yogurt!
The taste is spot on and I can say with confidence that I know what's in it. I won't have to buy another starter for the next batch. You simply use a bit from this batch to make the next. So cool! There is something so incredibly liberating with this small discovery. We are on our way to being more responsible for what we eat and it's very exciting. Cheddar crackers and granola bars are on the list for this week.
I hope you are in the midst of a lovely Tuesday and that you are able to feed your body and soul with something homemade.
Sorry, I got distracted. I also added whole milk and heavy cream to my purchase from the farmers market. The plan is to make butter from the cream and use the buttermilk to make creme fraiche. I didn't want to wait to order yogurt starter powder so I picked up plain Greek yogurt to use as my starter. I followed the directions in Homemade Pantry with serious focus and had great success. Oh and did I forget to mention that I thought I ruined the whole batch?! Yeah, I was supposed to let it sit in a warm place for 5 hours, that would have been until 2:30. At 6 I realized I had forgotten it. I was incredibly relieved that all my hard work (and half a gallon of whole milk) had not been wasted, it was fine.
There are loads of recipes out on the web but I'll give you the basic order of things so you can see just how easy it is.
You cook the milk to a certain temp and then cool it, add the starter, pour it all into jars, wrap them in towels and put in an insulated cooler in a warm place. Wait 5 hours and then refrigerate. That's it. So easy. This is totally doable, if you were on the fence, jump. You can make your own yogurt!
The taste is spot on and I can say with confidence that I know what's in it. I won't have to buy another starter for the next batch. You simply use a bit from this batch to make the next. So cool! There is something so incredibly liberating with this small discovery. We are on our way to being more responsible for what we eat and it's very exciting. Cheddar crackers and granola bars are on the list for this week.
I hope you are in the midst of a lovely Tuesday and that you are able to feed your body and soul with something homemade.
Thursday, July 12, 2012
Changing our norm
So the hubs and I have been watching loads of documentaries and reading lots of articles about shifting the way we look at our food and all of the things we put in and on our bodies and those of our babes. Most recently we watched "Bag it" a doc about plastic, mostly single use bags and packaging. They also touched on plastic children's toys and even the fragrance in our lotions and deodorant. I had never really given too much thought to those things. I remember the lead paint, Chinese toy scare and I've always wished for more handmade and wooden toys. I just never really saw the harm in picking up cheap plastic toys at yard sales and consignment sales. I won't go into all of it. I really don't want to be preachy, but if you are interested in learning more, check out the movie on Netflix.
Today is payday in our house. Today is the day I pull out the binder, pay the bills, check the budget and dole out all the money hubs worked so hard to earn. Today is also grocery day. Today is The Day some major changes come to this house of ours.
I thought I'd share my goals and guidelines with you so I have some accountability and because I imagine this space will reflect a lot of them in the weeks, months and years to come. I know many of you have been living this way for a long time (I envy your knowledge and experience). I am in no way claiming to know it all or be better than anyone else. I am simply sharing where our family is headed and our journey along the way.
Ok, here we go...
(The goal is to move away from buying at the grocery store, away from buying food that has traveled farther than the farmer who grew it, and reducing the purchase of plastic packaging. To move toward buying local, in season, real food from the person who grew/raised/made it.)
-Continue to grow and raise as much of our food as we possibly can. And to be good stewards of the land and animals in our care.
-No more processed food. This includes crackers, goldfish, ketchup, mayo, sour cream, yogurt, ice cream, salad dressing, all of it. I will buy it from a local farm or producer, make it, or go without.
- Go homemade! Bread, mayo, yogurt, maybe cheese (prob not soon), crackers, cookies, granola
bars, poptarts.
- Put it up! Can, freeze, dehydrate and otherwise store all the food we will need in the year to come. There are a few exceptions for this year, but I plan to put up as much as I can. Only buying out of season when I have to. The foods I see us running into problems with are broccoli and potatoes. I didn't have any success with my broccoli and my kids eat it 4 times a week and I don't think we'll get enough potatoes to last us through the winter.
- I will buy flours, sugar, rice, and other ingredients in bulk and from a local small business.
- No more commercially made beauty care products. Now, I am NOT throwing away my make up, deodorant and shampoo, but as they run out I will replace them with a homemade or natural alternative.
- No more commercially made cleaning products. Laundry soap, hand soap, surface cleaner, glass cleaner. You get the drift right?
- I will buy used first! That means clothes, shoes, housewares, furniture, tools, everything that we can.
- Recycling should be our last choice. Reduce first, reuse second (re-purposing counts too)
We are in a season of growth, bounty and excess. I hope to perserve some of that to sustain our family through the seasons of cold, barren and sparse. I recently read that most cities and towns only have enough food within their borders to sustain the residents for 3 days. Three days!! I am not interested in being effected by such truth.
Today is payday in our house. Today is the day I pull out the binder, pay the bills, check the budget and dole out all the money hubs worked so hard to earn. Today is also grocery day. Today is The Day some major changes come to this house of ours.
I thought I'd share my goals and guidelines with you so I have some accountability and because I imagine this space will reflect a lot of them in the weeks, months and years to come. I know many of you have been living this way for a long time (I envy your knowledge and experience). I am in no way claiming to know it all or be better than anyone else. I am simply sharing where our family is headed and our journey along the way.
![]() |
| So yummy! Homemade cookie with local ice cream. |
(The goal is to move away from buying at the grocery store, away from buying food that has traveled farther than the farmer who grew it, and reducing the purchase of plastic packaging. To move toward buying local, in season, real food from the person who grew/raised/made it.)
-Continue to grow and raise as much of our food as we possibly can. And to be good stewards of the land and animals in our care.
-No more processed food. This includes crackers, goldfish, ketchup, mayo, sour cream, yogurt, ice cream, salad dressing, all of it. I will buy it from a local farm or producer, make it, or go without.
![]() |
| Homemade poptarts |
- Go homemade! Bread, mayo, yogurt, maybe cheese (prob not soon), crackers, cookies, granola
bars, poptarts.
![]() |
| This book makes all of this seem possible. So many amazing recipes. Yogurt and granola bars are on the list for this week. |
![]() |
| small harvest of beets, beans and carrots. not enough to put up, but a yummy dinner. |
- No more commercially made beauty care products. Now, I am NOT throwing away my make up, deodorant and shampoo, but as they run out I will replace them with a homemade or natural alternative.
- No more commercially made cleaning products. Laundry soap, hand soap, surface cleaner, glass cleaner. You get the drift right?
- I will buy used first! That means clothes, shoes, housewares, furniture, tools, everything that we can.
- Recycling should be our last choice. Reduce first, reuse second (re-purposing counts too)
We are in a season of growth, bounty and excess. I hope to perserve some of that to sustain our family through the seasons of cold, barren and sparse. I recently read that most cities and towns only have enough food within their borders to sustain the residents for 3 days. Three days!! I am not interested in being effected by such truth.
Wednesday, June 13, 2012
They're PInk!
After steaming my last batch of eggs from the ladies I was left with 10 that had no job, per se. We can ALWAYS eat egg salad sandwiches in this house. For days in a row, we can, I've seen us do it. But, these 10 eggs being jobless coincided with my discovery of a hand full of beets that needed pulled to make room for the others to grow bigger.
What's a gal to do with a handful of fresh beets and 10 hard "boiled" eggs? Well much to my surprise, I decided to try my hand at pickled eggs. You see, I don't like pickled eggs. My grandmother used to buy them for my dad and I just remember the smell. It was yucky! I couldn't have described it as a kid but, I'm sure now, that it was old store eggs and way too much vinegar. I have heard that the homemade version are not even remotely similar and that I might like them. I've been hesitant. I was still not convinced even as I was making them. To be honest, I had no plans of eating them. I knew my dad would be thrilled to have them and hubs likes them too. I figured I wouldn't really have to.
Skip forward a few days..... My fam was headed down for a last minute "welcome home from the beach" cook out and I didn't have enough eggs to make a "my family sized" plate of deviled eggs. I pulled out that pretty jar that had been curing in the corner of the fridge for a few days and added them to the ranks to be deviled.
Now, I may not like pickled eggs, but deviled eggs are another story. I love them. I have for as long as I can remember. I get giddy when I see them on a buffet at a get together. That love affair was escalated to a whole new level when fresh eggs were put in the mix.
Well friends, I don't know if I like pickled eggs, but I sure do like pink deviled eggs! They were super yummy and looked so pretty on the plate. It may be a while before I just reach in and grab one from the jar for a snack, but I will always have a few handy for when deviled eggs are in order.
Here's the "recipe" I used to pickle my eggs. There are tons out there, but I wanted something super simple.
Beet Pickled Eggs
10-12 Hard boiled eggs. Here is a great way to "hard boil" fresh eggs.
4-5 small beets or 1-2 larger beets, washed and greens removed. You will use these to make 1 cup of beet juice and you will put the beet pieces in the jar.
1 1/2 cups of vinegar
2 Tbls sugar
Pack the peeled, clean eggs in a clean one quart mason jar
Then, make the beet juice:
Boil 1 1/2 cups of water with whole beets for 5-10 minutes depending on their size. They should be fork tender but not mushy.
Remove them from the water. Peel then slice or dice them into the size and shape of your choice.
Add them back into the beety water and boil 5-10 more minutes. Boil uncovered both times.
Next, add the vinegar and sugar to the beet juice and stir until sugar dissolves. Pour over the eggs in the jar until eggs are fully covered. Scoop out the beets pieces and add them to the jar. They will continue to color and flavor the eggs.
The longer you leave them in the refrigerator the deeper the color and flavors will go into the eggs. These were in the fridge for 3 days. Eggs should be refrigerated. Even when pickled.
Here's a link with more info.
This, for me, was reinforcement that we are in the right place. I was able to try something new without having to leave my back yard for ingredients. That, to me, is a life well lived. As our family walks through these seasons ahead, I dream of a day when I can get all that we need from our little piece of the Earth. For now, I will be grateful for the land and animals we have been given the privilege of caring for and the blessings they give us in return.
Tuesday, June 12, 2012
Eggs... hard steamed?
Sometime last summer it was passed along to me the best way to "hard boil" farm fresh eggs. If you've ever tried to actually boil them you know that it doesn't go well. Fresh eggs hang onto their shells for dear life. Store eggs are older and have more air under the shell. So, it will be an unexpected problem for you if you are new to farm fresh eggs. On that subject, are you still buying your eggs from the grocery store? Why?! There is someone in your area who raises chickens and can supply you with fresh eggs. No matter where you live, someone has eggs! It's worth paying a little bit more to have a far superior product. (Not to mention, you are supporting your community.)
If you aren't sure that there's really a difference crack a store egg and a fresh egg in the same pan, side by side. The yolk will be a different color, the white will be a different color and oh, how the yolk stands up with a fresh egg. It's not all runny and sick looking. The darker yellow/orange the yolk the more antioxidant rich greens the chicken has eaten. It's all very good for you and your family, and the chicken for that matter.
Ok, back to the matter at hand. I am going to share this "secret" with you. You don't actually boil the eggs, you steam them! Super simple, but it totally works. Here's how....
Put the eggs in the basket part of your steamer. (If you don't have a steamer, you can use any pot and put a metal colander in it to hold the eggs. As long as the lid fits snuggly inside of the colander the steam will stay in and it will work. I've even wrapped a colander and pot in foil to keep the steam in if the fit wasn't tight enough)
Fill the pot with a few inches of water. You don't want the water to touch the basket, it needs to boil and create steam under them.
I have found that it's better to go longer than risk not going long enough. I steam mine for 20-30 minutes depending how many eggs and what size they are. Then turn the heat off and let them sit (still covered) for another 20-30 minutes, if you have that long to wait.
Soak, or at least rinse them, in cold water and peel as usual. If you are still having a hard time, run them under cold water while you peel them.
That's it, super easy. It takes a bit longer, but not much.
Buy local, eat better! Eggs are the best place to start.
If you aren't sure that there's really a difference crack a store egg and a fresh egg in the same pan, side by side. The yolk will be a different color, the white will be a different color and oh, how the yolk stands up with a fresh egg. It's not all runny and sick looking. The darker yellow/orange the yolk the more antioxidant rich greens the chicken has eaten. It's all very good for you and your family, and the chicken for that matter.
Ok, back to the matter at hand. I am going to share this "secret" with you. You don't actually boil the eggs, you steam them! Super simple, but it totally works. Here's how....
Put the eggs in the basket part of your steamer. (If you don't have a steamer, you can use any pot and put a metal colander in it to hold the eggs. As long as the lid fits snuggly inside of the colander the steam will stay in and it will work. I've even wrapped a colander and pot in foil to keep the steam in if the fit wasn't tight enough)
Fill the pot with a few inches of water. You don't want the water to touch the basket, it needs to boil and create steam under them.
I have found that it's better to go longer than risk not going long enough. I steam mine for 20-30 minutes depending how many eggs and what size they are. Then turn the heat off and let them sit (still covered) for another 20-30 minutes, if you have that long to wait.
Soak, or at least rinse them, in cold water and peel as usual. If you are still having a hard time, run them under cold water while you peel them.
That's it, super easy. It takes a bit longer, but not much.
Buy local, eat better! Eggs are the best place to start.
Thursday, June 7, 2012
Waffles
I seem to be on a bit of a kick with making a better version of convenience foods. Here's another....
Waffles. Frozen waffles to be specific. You know the cardboard like things that come in the yellow box. They are loaded with yucky processed food like substances BUT, they are super convenient. We've had them in our freezer a time or two. Let's be honest morning is not the time of day that I feel super chipper and ready to whip up a gourmet breakfast with one eye open. I have 3 babes under 4. I haven't slept a full night in like 5 years. Sometimes, convenience wins.
Since adding the chickens to the mix there have been lots of scrambled eggs for breakfast but once in a while they all declare that they are not eating eggs again! Sometime last summer I picked up a waffle maker at a yard sale and tried the recipe that came with it. The waffles were good but seperating eggs and running multiple bowls was more than I wanted to deal with on a regular basis so we went back to pancakes and the waffle iron went in the back of the cabinet. Skip forward to about a month ago and I decided to try it again, but this time I went to my staple Better Homes and Gardens gingham table cloth cook book. The recipe in there was super easy. One bowl, one whisk, whole eggs. I was back in the waffle game.
I have adapted the recipe to be a bit more "healthy" by adding some whole wheat flour and oats but if you'd like a simple, tasty waffle just use unbleached all purpose.
Waffles
Adapted from Better Homes and Gardens Cookbook
1 cup unbleached all purpose flour
1/2 cup whole wheat flour
1/4 cup oats
2 Tbls sugar (you could totally substitute honey)
1 Tbls baking powder
1/4 teaspoon salt (leave this out if you are using salted butter)
2 eggs
1 3/4 cups milk
1/2 cup veg oil or butter (melted)
1 teaspoon vanilla extract
This is the order I put the ingredients in the bowl so that I can skip washing an extra bowl you could mix your dry and wet seperate and then combine.
Add eggs and whisk well, then add milk, butter or oil, and vanilla. Whisk well.
Add flours, oats, sugar, baking powder and salt.
Whisk until combined. It will have some clumps, that's ok.
Pour one cup of batter onto hot waffle iron that has been sprayed with nonstick spray or oil. Close lid. Finish according to your waffle irons directions.
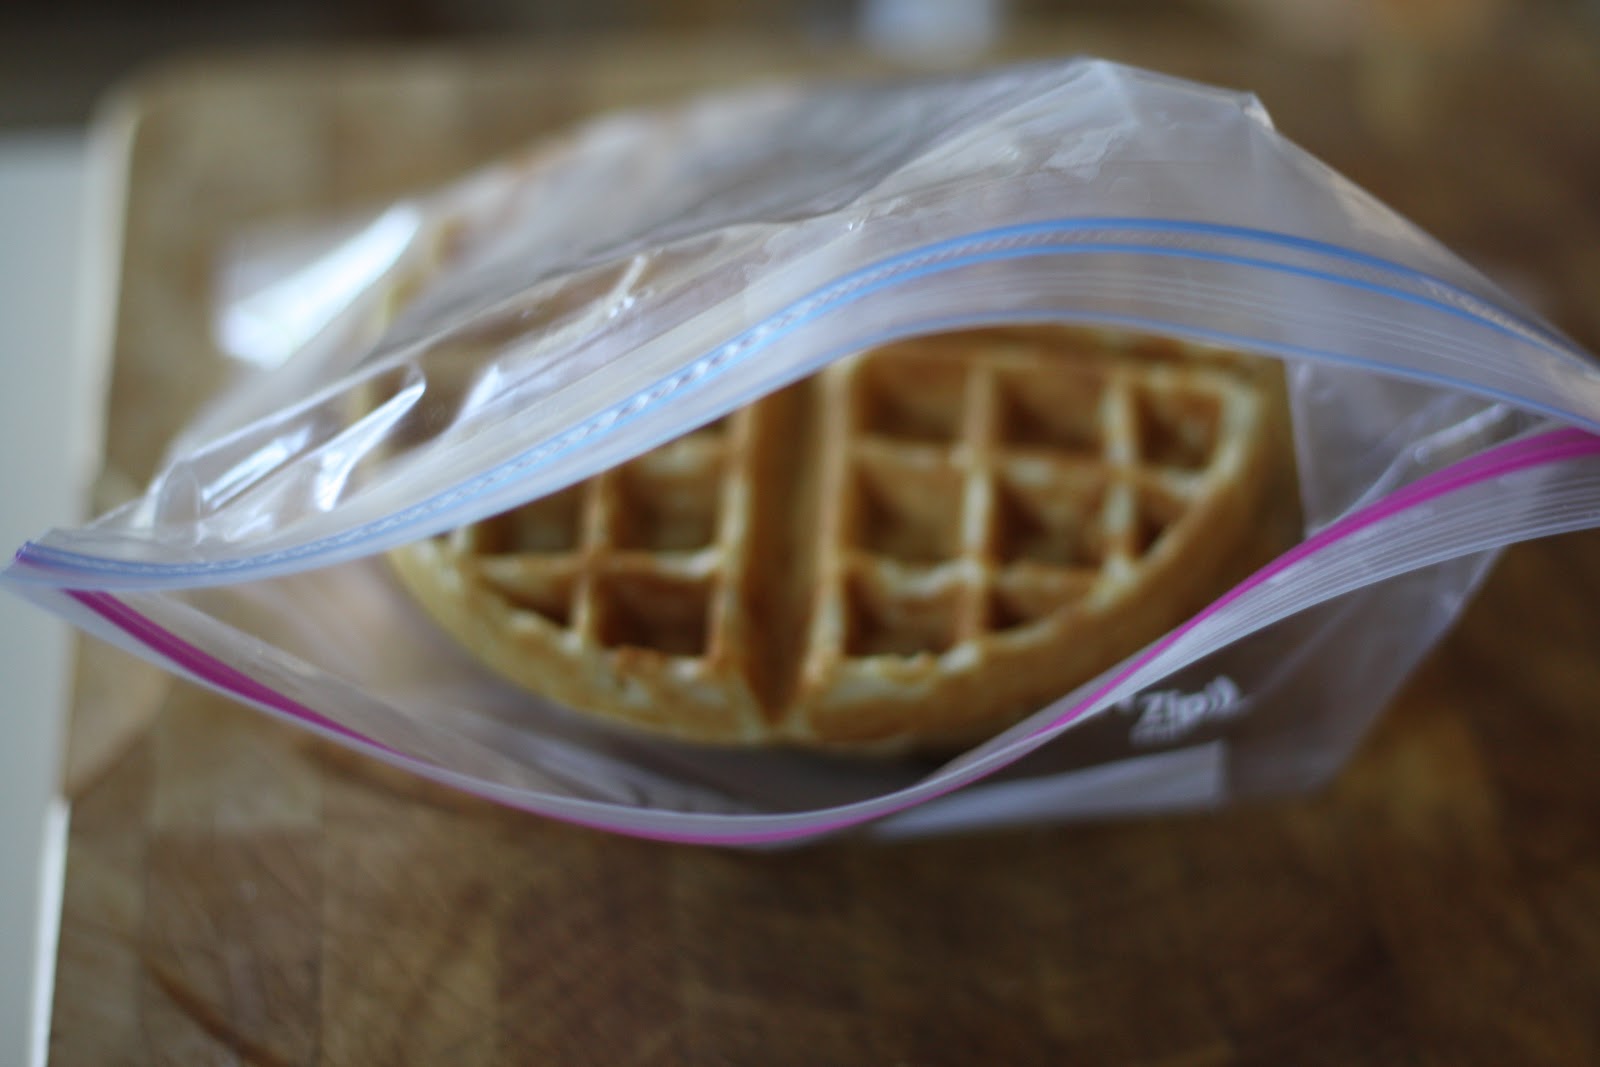
See super easy! This recipe makes 5 waffles in my iron. There are usually 2 or 3 left over. I let them cool and then put them into a ziploc bag and stick them in the freezer. When we want quick waffles another morning, I simply pull out how much we need and microwave them in a paper towel for 30-60 seconds. You could totally put them in the toaster.
Waffles. Frozen waffles to be specific. You know the cardboard like things that come in the yellow box. They are loaded with yucky processed food like substances BUT, they are super convenient. We've had them in our freezer a time or two. Let's be honest morning is not the time of day that I feel super chipper and ready to whip up a gourmet breakfast with one eye open. I have 3 babes under 4. I haven't slept a full night in like 5 years. Sometimes, convenience wins.
Since adding the chickens to the mix there have been lots of scrambled eggs for breakfast but once in a while they all declare that they are not eating eggs again! Sometime last summer I picked up a waffle maker at a yard sale and tried the recipe that came with it. The waffles were good but seperating eggs and running multiple bowls was more than I wanted to deal with on a regular basis so we went back to pancakes and the waffle iron went in the back of the cabinet. Skip forward to about a month ago and I decided to try it again, but this time I went to my staple Better Homes and Gardens gingham table cloth cook book. The recipe in there was super easy. One bowl, one whisk, whole eggs. I was back in the waffle game.
I have adapted the recipe to be a bit more "healthy" by adding some whole wheat flour and oats but if you'd like a simple, tasty waffle just use unbleached all purpose.
Waffles
Adapted from Better Homes and Gardens Cookbook
1 cup unbleached all purpose flour
1/2 cup whole wheat flour
1/4 cup oats
2 Tbls sugar (you could totally substitute honey)
1 Tbls baking powder
1/4 teaspoon salt (leave this out if you are using salted butter)
2 eggs
1 3/4 cups milk
1/2 cup veg oil or butter (melted)
1 teaspoon vanilla extract
This is the order I put the ingredients in the bowl so that I can skip washing an extra bowl you could mix your dry and wet seperate and then combine.
Add eggs and whisk well, then add milk, butter or oil, and vanilla. Whisk well.
Add flours, oats, sugar, baking powder and salt.
Whisk until combined. It will have some clumps, that's ok.
Pour one cup of batter onto hot waffle iron that has been sprayed with nonstick spray or oil. Close lid. Finish according to your waffle irons directions.
See super easy! This recipe makes 5 waffles in my iron. There are usually 2 or 3 left over. I let them cool and then put them into a ziploc bag and stick them in the freezer. When we want quick waffles another morning, I simply pull out how much we need and microwave them in a paper towel for 30-60 seconds. You could totally put them in the toaster.
Wednesday, June 6, 2012
Homemade really is better.... Poptarts.
I am sure that I'm not the only mama who dreads going to the grocery store with her kids. Not just because it's the grocery store... with your kids, but because, inevitably, at least one end cap will have the brightly colored, kid eye catching, junk food. I can see it in the oldest eyes, she wants it. I then have to explain that we don't eat "foods" that are loaded with the by products of genetically engineered corn and soy. High fructose corn syrup is in EVERYTHING! I mean seriously, everything. Do we really need sugar in our canned tomatoes?! Just because it's cheap doesn't mean it's good or necessary.
My sister and I were at Costco a few months ago and Brielle caught sight of the giant box of pop-tarts while we were waiting to check out. "Mom! Can I pleeeease have those? They look so good!" Now I knew from the last time I caved and let her have them that she doesn't really like pop-tarts once she gets past the shiny paper. I was about to remind her of that when my sister piped in "wow, those are really cheap. I mean $4 for that huge box?!" So in the cart they went. Auntie said it was ok. Anyway, jump forward 5 or so days. Brielle had tried one pack from each of the "flavors" and had, once again, decided she didn't like pop-tarts. I made a mental note to find a better option.
I found one! A better option that is. I stumbled upon this book while I was trolling around bloggerville. It is loaded with super cool recipes and ideas for making convenience foods from scratch with better ingredients. Some of them I already do, some I don't but will be soon.
I don't want to break the rules and give you the exact recipe from the book but I'll give you the jist of it. It's not rocket science.
Homemade toaster pastries:
adapted from Homemade Pantry
- 2 pie crusts (use any recipe you like, I don't think it really matters). Sidenote: you are always making extra pie crusts and freezing them right? You have too. Pie crusts are not super hard to make, but they annoy me.
-one egg, beaten
-filling of choice
-powder sugar for dusting top (optional)
Roll the first pie crust out into a rectangle and cut into 6 smaller rectangles
Brush them with egg and smear with your choice of goodness. We did blackberry jelly and cinnamon sugar.
Roll out the second pie crust and cut into matching rectangles. Then place them on top of the bottom ones.
Crimp the edges with a fork and brush with remainder of egg. Poke a few holes in the top to allow the steam to escape.
Bake for 20-25 minutes at 375.
Let cool for at least 20 minutes before sugaring or eating.
3 sets of little thumbs up! They taste different than the junk in the blue box. They taste. Like food. Not cardboard. I'm sold. It really wasn't hard. If you need to make them even more convenient. Make a few batches and freeze them, unbaked, on parchment paper then stack them in a freezer container until you are ready for them. A few would fit perfectly in a toaster oven and you wouldn't even have to heat up the kitchen.
Now, let me balance with this statement. My kids have eaten pop-tarts, oreos, goldfish, icecream and all sorts of other junk foods that I didn't make. I am not claiming to be the vision of health and good choices. I am claiming to be a mindful mama who, when I can, tries to make the best choices for my family on what they eat.
My sister and I were at Costco a few months ago and Brielle caught sight of the giant box of pop-tarts while we were waiting to check out. "Mom! Can I pleeeease have those? They look so good!" Now I knew from the last time I caved and let her have them that she doesn't really like pop-tarts once she gets past the shiny paper. I was about to remind her of that when my sister piped in "wow, those are really cheap. I mean $4 for that huge box?!" So in the cart they went. Auntie said it was ok. Anyway, jump forward 5 or so days. Brielle had tried one pack from each of the "flavors" and had, once again, decided she didn't like pop-tarts. I made a mental note to find a better option.
I found one! A better option that is. I stumbled upon this book while I was trolling around bloggerville. It is loaded with super cool recipes and ideas for making convenience foods from scratch with better ingredients. Some of them I already do, some I don't but will be soon.
I don't want to break the rules and give you the exact recipe from the book but I'll give you the jist of it. It's not rocket science.
Homemade toaster pastries:
adapted from Homemade Pantry
- 2 pie crusts (use any recipe you like, I don't think it really matters). Sidenote: you are always making extra pie crusts and freezing them right? You have too. Pie crusts are not super hard to make, but they annoy me.
-one egg, beaten
-filling of choice
-powder sugar for dusting top (optional)
Roll the first pie crust out into a rectangle and cut into 6 smaller rectangles
Brush them with egg and smear with your choice of goodness. We did blackberry jelly and cinnamon sugar.
Roll out the second pie crust and cut into matching rectangles. Then place them on top of the bottom ones.
Crimp the edges with a fork and brush with remainder of egg. Poke a few holes in the top to allow the steam to escape.
Bake for 20-25 minutes at 375.
Let cool for at least 20 minutes before sugaring or eating.
3 sets of little thumbs up! They taste different than the junk in the blue box. They taste. Like food. Not cardboard. I'm sold. It really wasn't hard. If you need to make them even more convenient. Make a few batches and freeze them, unbaked, on parchment paper then stack them in a freezer container until you are ready for them. A few would fit perfectly in a toaster oven and you wouldn't even have to heat up the kitchen.
Now, let me balance with this statement. My kids have eaten pop-tarts, oreos, goldfish, icecream and all sorts of other junk foods that I didn't make. I am not claiming to be the vision of health and good choices. I am claiming to be a mindful mama who, when I can, tries to make the best choices for my family on what they eat.
Tuesday, March 13, 2012
Holy, Holy, Holy homemade dark chocolate syrup!
Yesterday I was here to sing praise for the homemade ranch dressing. Well, that's got nothing on today's homemade goodness, no not goodness, super duper awesomeness!! Oh my. So if you remember I make a lot of Mochas in this house. It's my favorite of all the coffee options. While I feel confident that drinking coffee is good for my body, my soul and the health and safety of my family, I have been struggling with the chocolate syrup I used. It has corn syrup and all sorts of other ingredientst that Micheal Pollen would not approve of. NOT ANY MORE!!! I am so excited to add one more thing to the "I will never buy this again" list.
I found a recipe on Pinterest a few months ago and that got the idea brewing and then this morning I ran out of the store bought stuff. Ahh, gasp. Time to get making.
Here's the recipe after my changes:
Homemade Dark Chocolate Syrup
1 1/2 cups of sugar (I used organic because, well, it's the kind of sugar I use.)
3/4 cup unsweetened dark chocolate powder (I used Hershey's special dark because I had some, but I will be investing in a higher quality chocolate moving forward)
1 cup of water
1 tsp vanilla
(Update: you should really add somewhere between a pinch and 1/4 teaspoon of salt - I almost always forget to add this and really can't tell a difference but, it is supposed to be in there)
In a saucepan whisk together sugar, cocoa and salt. Add water and bring to a boil. Stir frequently to avoid sticking and burning. Turn off heat (if you use gas reduce heat to low) and cook for 1 minute. Remove from heat, add vanilla and let cool. SO EASY! Store in the fridge in an airtight container.
No high fructose corn syrup, no GMOs. Just delicious chocolately goodness!! You're welcome.
Reminder: Go like LouLeeLou on Facebook to be entered in the giveaway! When we reach 100 likes I'll give away a boo-boo birdie of your choice. Shipping included! How fun is that?! Want another chance to win? Have someone else like us and mention your name in a comment on the wall. Get to sharing!
Monday, March 12, 2012
Holy Unhidden Valley! Homemade Ranch.
So a few weeks ago I found this recipe for Ranch Dressing on pinterest. We are a Ranch loving family so I was really excited at the idea of a homemade option. I was a pretty disappointed. It was not great. It tasted ok, but not something I would say could replace the green lidded bottle in the fridge. As it turns out, I messed up. The recipe calls for fresh herbs and I only had dried. I kept the amounts the same rather than reducing. Big Mistake.
Skip to last night. Hubs had been bugging me to make it again because even though it wasn't great, he loved it. We followed the recipe as a guide but made some changes to account for the dried herbs. Success!! It is amazing! Seriously, I will NEVER buy ranch dressing again.
Just in case some of you would like to whip up some ranch with what you already have in your spice cabinet.
Here's the recipe with our alterations:
-3/4 cup mayonnaise
-3/4 cup sour cream
-1 Tbsp olive oil
-1 Tbsp lemon juice
-1/4 to 1/2 cup buttermilk (we used regular milk)
-1/4 cup dried chives
-scant 1/4 cup of dried parsley
-1 clove garlic (hubs just informed me that he doubled this)
-1/2 tsp salt
-1/2 tsp pepper
Directions:
- Place all ingredients with 1/4 cup of milk in a blender
- Blend for 10 seconds. Check consistency and blend in additional buttermilk if desired. Less buttermilk for dipping, more for dressing.
- Store in an air-tight jar in the fridge for a week or more.
Monday, January 9, 2012
Dinners.
Warning: Those of you who are not Daniel Fasters please know this is not really for you. Don't fret though, I've been covering everything in my house in yarny goodness. I promise to share tomorrow.
Today was the first "normal" day of the Daniel Fast. We got up, hubs went to work, the littles and I had a busy day at home. There were Cheezits, cheerios, mac and cheese, chocolate milk and all sorts of yummy things that I am not having for this 21 day period. Normally, those things would not seem at all like something I needed to have but when we are told we may not, we feel as if we must.
Breakfast for me was a banana and some almonds. Lunch green beans spritzed with olive oil and some sea salt. I had some left over pasta in the afternoon and I had Fried Rice for dinner.
I knew I was going to make rice for dinner but I was unsure what I was going to make with it. I settled on Stuffed peppers (I knew hubs would like them and he was not super pleased with the whole wheat penne I made yesterday). However after getting them in the oven I realized, I didn't want that. At all. You see, I don't really like peppers. Except for the ones that grew in our garden this summer. That brings us back to the fried rice.
Here are the recipes for both. Please be patient with me. I am terrible at relaying what I do when I cook. It's usually a little of this, sprinkled into a little of that. So please feel free to adjust these to your tastes.
Fried Rice
1 cup uncooked rice, cooked. I used a ratio of 3:1 brown to wild rice.
1 Tablespoon chopped garlic or 2 cloves fresh garlic
about a cup of frozen corn
about a cup of frozen peas
one carrot chopped
1/2 a cup of diced onion (I think green onion would be a really yummy option)
1 Tablespoon olive oil
1 teaspoon. seaseme oil
1 Tablespoon seaseme seeds.
In a fry pan heat olive oil. Add onion, carrot and garlic. Once onions are transluscent at corn and peas and about 1/4 cup of water. Cover and let simmer about 10 minutes.
Add rice and seaseme oil.
Dry roast the seaseme seeds and add just before serving.
I added a larger amount than most would of soy sauce.
Stuffed Peppers
2 peppers cut in half with seeds and veins removed
1 cup uncooked rice, cooked. Again same ratio brown and wild rice.
1 tablespoon olive oil
1/2 can diced tomato
1/2 cup diced mushroom
1/4 cup diced onion
1 Tablespoon chopped garlic or 2 cloves fresh garlic, diced.
couple shakes of basil
Lay peppers in baking dish sprayed with olive oil. Spritz inside of peppers with olive oil.
In fry pan add olive oil onion, garlic and mushroom. Sautee until onion is transluscent and mushrooms soft. Add basil (and any other spices that seem like a good idea.) Salt as you see fit.
Add tomato and rice to pan and cook about 5 minutes.
Add to peppers and bake at 350 for 45-60 minutes. For last 5 minutes broil until peppers begin to char.
I've talked to a few of you over the last few days and am hearing a few common threads. You miss your coffee and you aren't sure about "the rules". I want to reiterate was Pastor Don said, "Let your conscience be your guide". I have the guidelines on the Daniel fast page (look at the top right corner of this page) but don't beat yourself up if you miss something. I am of the line of thought that, as in all things in my life, perfection is not a realistic goal. I will do the best I can and remember what it's all about. Keep up the good work! You are doing great. (Unless you've already bailed and are pigging out on cheeseburgers. In that case, you're a huge SLACKER! kidding, kind of.)
Today was the first "normal" day of the Daniel Fast. We got up, hubs went to work, the littles and I had a busy day at home. There were Cheezits, cheerios, mac and cheese, chocolate milk and all sorts of yummy things that I am not having for this 21 day period. Normally, those things would not seem at all like something I needed to have but when we are told we may not, we feel as if we must.
Breakfast for me was a banana and some almonds. Lunch green beans spritzed with olive oil and some sea salt. I had some left over pasta in the afternoon and I had Fried Rice for dinner.
I knew I was going to make rice for dinner but I was unsure what I was going to make with it. I settled on Stuffed peppers (I knew hubs would like them and he was not super pleased with the whole wheat penne I made yesterday). However after getting them in the oven I realized, I didn't want that. At all. You see, I don't really like peppers. Except for the ones that grew in our garden this summer. That brings us back to the fried rice.
Here are the recipes for both. Please be patient with me. I am terrible at relaying what I do when I cook. It's usually a little of this, sprinkled into a little of that. So please feel free to adjust these to your tastes.
Fried Rice
1 cup uncooked rice, cooked. I used a ratio of 3:1 brown to wild rice.
1 Tablespoon chopped garlic or 2 cloves fresh garlic
about a cup of frozen corn
about a cup of frozen peas
one carrot chopped
1/2 a cup of diced onion (I think green onion would be a really yummy option)
1 Tablespoon olive oil
1 teaspoon. seaseme oil
1 Tablespoon seaseme seeds.
In a fry pan heat olive oil. Add onion, carrot and garlic. Once onions are transluscent at corn and peas and about 1/4 cup of water. Cover and let simmer about 10 minutes.
Add rice and seaseme oil.
Dry roast the seaseme seeds and add just before serving.
I added a larger amount than most would of soy sauce.
2 peppers cut in half with seeds and veins removed
1 cup uncooked rice, cooked. Again same ratio brown and wild rice.
1 tablespoon olive oil
1/2 can diced tomato
1/2 cup diced mushroom
1/4 cup diced onion
1 Tablespoon chopped garlic or 2 cloves fresh garlic, diced.
couple shakes of basil
Lay peppers in baking dish sprayed with olive oil. Spritz inside of peppers with olive oil.
In fry pan add olive oil onion, garlic and mushroom. Sautee until onion is transluscent and mushrooms soft. Add basil (and any other spices that seem like a good idea.) Salt as you see fit.
Add tomato and rice to pan and cook about 5 minutes.
Add to peppers and bake at 350 for 45-60 minutes. For last 5 minutes broil until peppers begin to char.
I've talked to a few of you over the last few days and am hearing a few common threads. You miss your coffee and you aren't sure about "the rules". I want to reiterate was Pastor Don said, "Let your conscience be your guide". I have the guidelines on the Daniel fast page (look at the top right corner of this page) but don't beat yourself up if you miss something. I am of the line of thought that, as in all things in my life, perfection is not a realistic goal. I will do the best I can and remember what it's all about. Keep up the good work! You are doing great. (Unless you've already bailed and are pigging out on cheeseburgers. In that case, you're a huge SLACKER! kidding, kind of.)
Subscribe to:
Posts (Atom)